Tuesday, May 23, 2017

Eileen Hull Notebook Pocket Kunin Felt Patina Effect

Hello Blog land, I have an Eileen Hull Notebook Pocket design using Kunin Group Felt & patina. Crazy idea right? Don't you love those? Eileen's design team are playing with Kunin felt this month & Eileen's Heartfelt release. I love looking at my teamies felt projects, they are wonderful. However, me being the grungier, painterly, mix media non-cutesy team member was in a bit of a panic. How on earth do I work with felt, and stick to my style? Or how do I make felt look grungy & cool without losing the felt in the process? I can happily say, I am loving playing with felt- who knew? *full supply list at end of post.

Notebook Pocket die covered in felt & patina acrylic paint.
Eileen Hull Notebook Pocket die by Sizzix

Let's Play with Re-cycled Felt!

This is what I came up with.  I am using the Notebook Pocket die which has been re-released by Sizzix. It has the perfect pouch that fits a smaller journal in it. Let's have a mini-tutorial shall we? This project was actually quite easy.

Easy Cut Adhesive by *therm.o.web is super strong & perfect for journal covers.

Start with a piece of mat board and apply a strong 2 sided adhesive. Adhere a piece of felt. I used Kunin ecofi Plus felt (made in the USA). It is a heavier, strong felt & is made from re-cyled plastic bottles- how cool is that? Perfect for covering the outside of projects. If you want your project to have paper on the inside adhere it, or you can also use paint. Run this covered board with the Notebook Pocket die though your die cut machine. Put it felt side down to get the scores on the correct side. Peel the felt & one layer of mat board off the outside edge with the holes. This will make the pocket easier to glue together.

felt with brass paint in 1 picture & embossed with a pattern, added blue & mint green paste to create a patina.
Felt adds a whole dimension to the patina effect.

Painting on Felt- How Odd!

First off I purposely switched and used the back as the front of the project. The holes that are punched to adhere brads to secure the pocket needed to be on the front of my project. I used Finnabair's Patina Effects kit, starting with the Brass Paste & painting it on in spots. Let that dry. I had my emboss folder & Vagabond platform ready to go. Paint the Blue & Mint-Green paste and while wet put it in the folder and run it through the machine. Clean the folder with warm water & soap immediately. 

The effect is very cool. The paint smooches (technical term) together, gets embossed and because of the texture of the felt really looks patina like. The felt fibers kind of stick out making the result look very textural. I only did the treatment to the front section, but you could chose to emboss the back of it also. 


Next I took some of Eileen's new thinlet dies from her Heartfelt Collection and cut them out of the *therm.o.web PeelnStick Toner Sheets. Using a laminator I ran them through with Deco Foil Transfer Sheets as per the instructions. Shiny!

Foiling Is Fun!

Using the butterfly over lay from the same set I die cut the felt. The secret to die cutting felt so it cuts nice & crisp is to put a piece of card stock under the felt. I also used the precision base plate which helped. Be careful to use the correct plates for your machine. For example with the Vagabond I only needed 1 cutting pad when using the Precision Base Plate. I glued the felt butterfly onto my foil background- love this combo. 

Stitchy Flower & Leaf Thinlet dies plus Kunin Felt

Let's Build a Flower

I wanted my flower to be a bit grungy so after cutting the pieces out of the felt I heated them a bit with my heat gun being careful not to let the pieces burn. I did get some cool holes however. Next was a layer of Glimmer Glam in Silver Diamonds. This gave the felt a glitter a glitter look & stiffened the fabric. You can see my foil stamen in the middle with a coil brad holding the flower pieces together.  

Twist & Style Tool

A little extra something was needed. Coiled wire, so it was time to pull out Eileen's Twist & Style Tool. this tool is amazingly easy to use & adds a lot to my projects. To see it in action you can check out the videos here. I used copper & gold wire and once it was wrapped it was easy to bend into place.

Grungy Felt Flower

I looped the ends through the brads to hold the wire securely. All that was left was to adhere my handmade embellishments. 


Here are some close ups so you can get a better idea. I painted the inside with a copper paint. Hint: an iphone 6 plus with a case also fits inside!! I also used a few pieces of the wire to add interest to my word band. The words were inked so they would stand out. That's it! Now I have a lovely notebook pocket that can hold a notepad & pen for my special thoughts. This would also make a lovely gift. Thanks for joining me & thank you to Kunin Felt & *therm.o.web for supplying some fun products to work with. 

Supplies:

  • Eileen Hull Dies by Sizzix- Notebook Pocket -656235  
  •                                       -Stitchy Flowers & Leaf -661903
  •                                        -Birds & Butterflies -661901
  •   "   Emboss Folder     "     -Starlight
  •   " Twist & Style Tool  "
  • Kunin Group Felt- Ecofi Plus- Black, Lagoon.
  •          "                -Ecofi Classic-Pumpkin Spice, Olive.
  • *thermo.o.web- PeelnStick Toner Sheets
  •          "             - Deco Foil Transfer Sheets in Gold. 
  • Finnabair by Prima- Patina Kit 
  • Tim Holtz by Ideology - Word Band

Wednesday, May 17, 2017

Deco Foil Tutorial on a Chipboard Journal Book

Hello Blog Land, today I have a tutorial playing with Deco Foil by *therm o web. I also have the worlds smallest blog hop going on! There will be a prize for one lucky hopper.

Here are the very few rules. 

1. Follow my blog- I do have a lot of cool stuff going on here & don't post crazy often.
2. Leave me a comment on each of the 3 blog stops (yes that says 3- stop laughing)
3. See I told you very few rules, I guess I could have said there were a couple of rules but we artists like uneven numbers.

Stop 1- you are here, please read, learn, soak up the fun & comment.
Stop 2-my Southern Ridge Trading Co. post on this book with photos of the inside (did I tell you it's bigger on the inside?). 
Stop 3- my first 5 days stroll in my hood.

Chipboard journal with a debossed patterned dragonfly cut out colored in greys, blues & burgandy.
Southern Ridge Trading Co. Zen Dragonfly Journal

Check Out This Cool Book!

First off this is my design team post for Southern Ridge Trading Co. which is the 2nd stop on the hop. check out their fabulous products as well as a peak at some of the finished pages inside my book. I am really good at making books but less great about working on the insides! 


I am also entering this in the Mixed Media Place Challenge. Loved their mood board & was definitely inspired by the colors & the quote. Good things take time. I used the quote on the inside of my book but I also was mindful of that as I made my book. I enjoyed the process & too my time designing it, even with a looming deadline! Here is a link to the current challenge.


Let's Get Some Foiling Going!

I was given a lovely box of *thermo.web.products to play with. I love adding foil accents to my art journal projects. It adds a pop of shiny, lovely, mirror color which adds another layer of texture to my pieces. I decided to play with a few of them to compare which ones worked best for my use. If you know me I almost always must use stencils, texture & stamps to my projects. 

So Many To Choose From! 

I decided to work with 4 forms of adhesive. One of the challenges is how do you foil a thicker item like chipboard? Not sure it would go through my laminator which is designed for paper. Also chipboard + extended heat may not make it happy either. A test for another day. Lucky for us Deco Foil has an answer. 

1. Transfer Gel with foamie   2. Transfer Gel with palette knife.

Let's Do Some Tests.

I started with a piece of black mat board. Using Transfer Gel, the number stencil & a palette knife I scraped the gel onto the board. I also added it through the brick stencil using a piece of foam. I let it dry as per the instructions until clear. I then placed a piece of the Summer Rainbow Transfer Sheet color side up & ran it through my Vagabond. Use the same sandwich as an emboss folder. My teammate Ava gave me a hot tip- use a new unscratched plate on top or the cut images in the plate transfer into the foil. I added a piece of card stock on top which worked fine. 


The foamie above did not work well as you see not much of a transfer. I wondered if it was because there were 2 different height layers of gel running through the machine at the same time, or not enough pressure. I repeated this step changing 2 things. 1. I really pushed the gel into the mat board when applying through the stencil, making sure there was good coverage. 2. I added the thin die adapter to the sandwich. I ran it through the Vagabond twice. The results were much better!!! Yay. 


Now I was ready for my chipboard title. I followed the same steps & voila beautiful shimmer was added with the Emerald Watercolor Transfer Sheets. In the spots where the foil was sketchy I re-applied adhesive & used Aqua colored foil. This upped the grunge factor!


Next Up: Liquid Adhesive.

For my next chippie pieces I wanted a more portable idea. Let's say I am traveling & don't want to bring my vagabond or my laminator. Well Deco Foil Liquid Adhesive to the rescue. I applied a thin layer with a foamie again & let dry 1-2 hours. Place your foil sheet, color side up over the chippie & rub gently using a bone folder, not to scratch the foil too much but enough so the foil adheres. Works brilliantly. 

Update your plain cardboard with shimmery foil sheets.


Last But Not Least: 

I tried out the PeelnStick Toner Sheets. This time I needed the laminator. I die cut using an Eileen Hull butterfly thinlet (made me very happy that it worked) I ran it back & forth through my Vagabond and got a good cut. Followed the easy instructions placing foil on top of the butterfly cut and in between the parchment included in the sheet pack. Ran it through the laminator & bam lovely foiled piece! I also used this technique to place foil behind my dragonfly. I cut out a piece large enough to cover the dragonfly image, foiled it & adhered it to the back of my cover so the foil peeks out through the dragonfly image. Love it!! 


 I moved the cover to show the foil. The color on the left is the true color of the book & the right shows what the foil looks like. As the book moves it catches the light & reveals the color. 

 What is the prize you are asking? 

If you are participating in my wee blog hop, I will choose one random winner who will receive a Southern Ridge Trading co. stencil, and some chippies. Make sure you follow all the rules! Thanks for playing with my silliness.  

I am also entering this in the Words & Paintery Contest which you can find here. 
Love their monthly challenges, a great way to be inspired.  

You can find a list of supplies on the Southern Ridge Post. 


Monday, May 15, 2017

An Artul Adventure with Nathalie Kalbach.

I am participating in a free class, Artful Adventures by Nathalie Kalbach.
It is a wonderful idea about taking photos while "strolling through the hood" & documenting with photos where you live. It is a 30 day challenge & will also give ideas about how to use your photos in your art. There are also artist interviews which are really great to listen to. Click on the link above for a video explaining this class. I will take you on the first 5 days of my stroll.
 
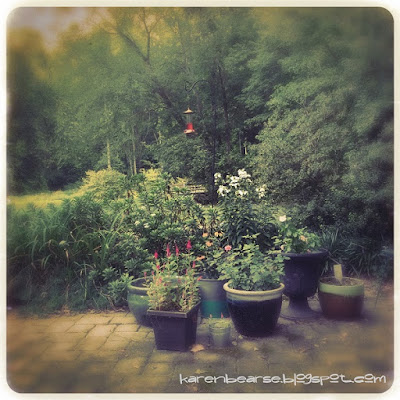
photo of garden pots on stone patio lots of roses, pinks, purples & white azaleas
Day 1: Home - My Garden Oasis

 Let's Take Some Photos!

I encourage you to come & play. Everyday we are posting a picture based on a prompt in Instagram. I love using the Hipstamatic app which allows me to change the camera lens & film giving all kinds of different effects. Most of my photos are taken using this app. It is just too much fun to play with! 

photo of dark rainy sky, cars at a green light stopped in traffic
Day 2:Transportation


I Spend A Lot of Time in Traffic

I decided I wanted to go a step further & create a book to put my pics in. I realized as I was taking my photos, there is more to the story than just the picture. The photos are creating a story of their own. Making a journal book to document the photos I take seemed a logical step. Plus I am an expert in taking something simple like posting a photo every day on Instagram & turning it into something complicated! 

sepia tone photo of the side of a lacrosse goal showing the pole & net with trees in the background
Day 3: Fence


Don't Fence Me In!

We don't have a fence in our yard and other than people's personal fences there aren't that many of note in the neighbourhood. What's a girl to do? How about a play on the word fence?  My daughter is a lacrosse goalie and we have a net in the backyard. How about defense as in de-fence! Brilliant & to really tie it in the net looks like chain link which is used for, you guessed it fences!

black & white photo of a metal mailbox in a bed of flowers
Day 4:Mailbox


What's In Your Mailbox?

My mailbox it kind of dinged up & could use a refresh but who has time for that? It is so far down on the list of things to do it doesn't even make the list. There is of course a story to go with it as with most of my life. One of our good friends dinged it up while backing out of our driveway. She of course was mortified. I kind of like that my mailbox has a story. 


walkway at night with solar lights in a ray pattern
Day 5: Shine


Let Your Light Shine On

Last One for today is a photo of one of the lights on my walkway. My husband added these cool solar lights that make a sun ray pattern. Love it! At this point I realize I am not really strolling through my hood, more like strolling around my house. I will be now venturing our into my neighbourhood for the next set of pics!

I hope you check back here on the 17th to see a post on my journal book. I make a lot of books but there are a couple I really want to get into working on the inside!!! You know in my "spare" time. The post will also show a tutorial on playing with Deco Foil by *therm.o.web. Until then I hope to see you on #artfuladventures thanks Nathalie for offering this free class!!!

Wednesday, May 3, 2017

Let's Make a Patina Beach Chair

I am on the Southern Ridge Trading Blog today with a patina tutorial. I did a step by step on how to use the Prima Marketing Patina Effects Paste kit. 

tag with an altered adirondack chair in blue/green patina. Shells and beads in blues and greens.
Take Me To The Ocean!

Here is my final tag. I hope you hope on over & check out the project!

LinkWithin

Related Posts Plugin for WordPress, Blogger...